
Nothing can be more dangerous in your plumbing than a leaking water heater. The heated leaky water may sometimes drop on someone’s body and cause burns. Also, it can lead to water damage, mold growth, and increased energy bills.
Hence, you must know how to fix a leaking water heater at home safely. And for this, you must understand the reasons behind a leaking water heater. It will help you know which part of the water heater needs to be fixed promptly and avoid further damage.
Today, we will discuss the common causes of a leaking water heater and provide a comprehensive step-by-step guide to fix the problem. So, for your safety, continue reading.
Reasons for a Leaking Water Heater:
A leaky water heater can be hazardous. From scalding your skin to causing plumbing damage, it causes serious issues. So, you better understand why a water heater becomes leaky.
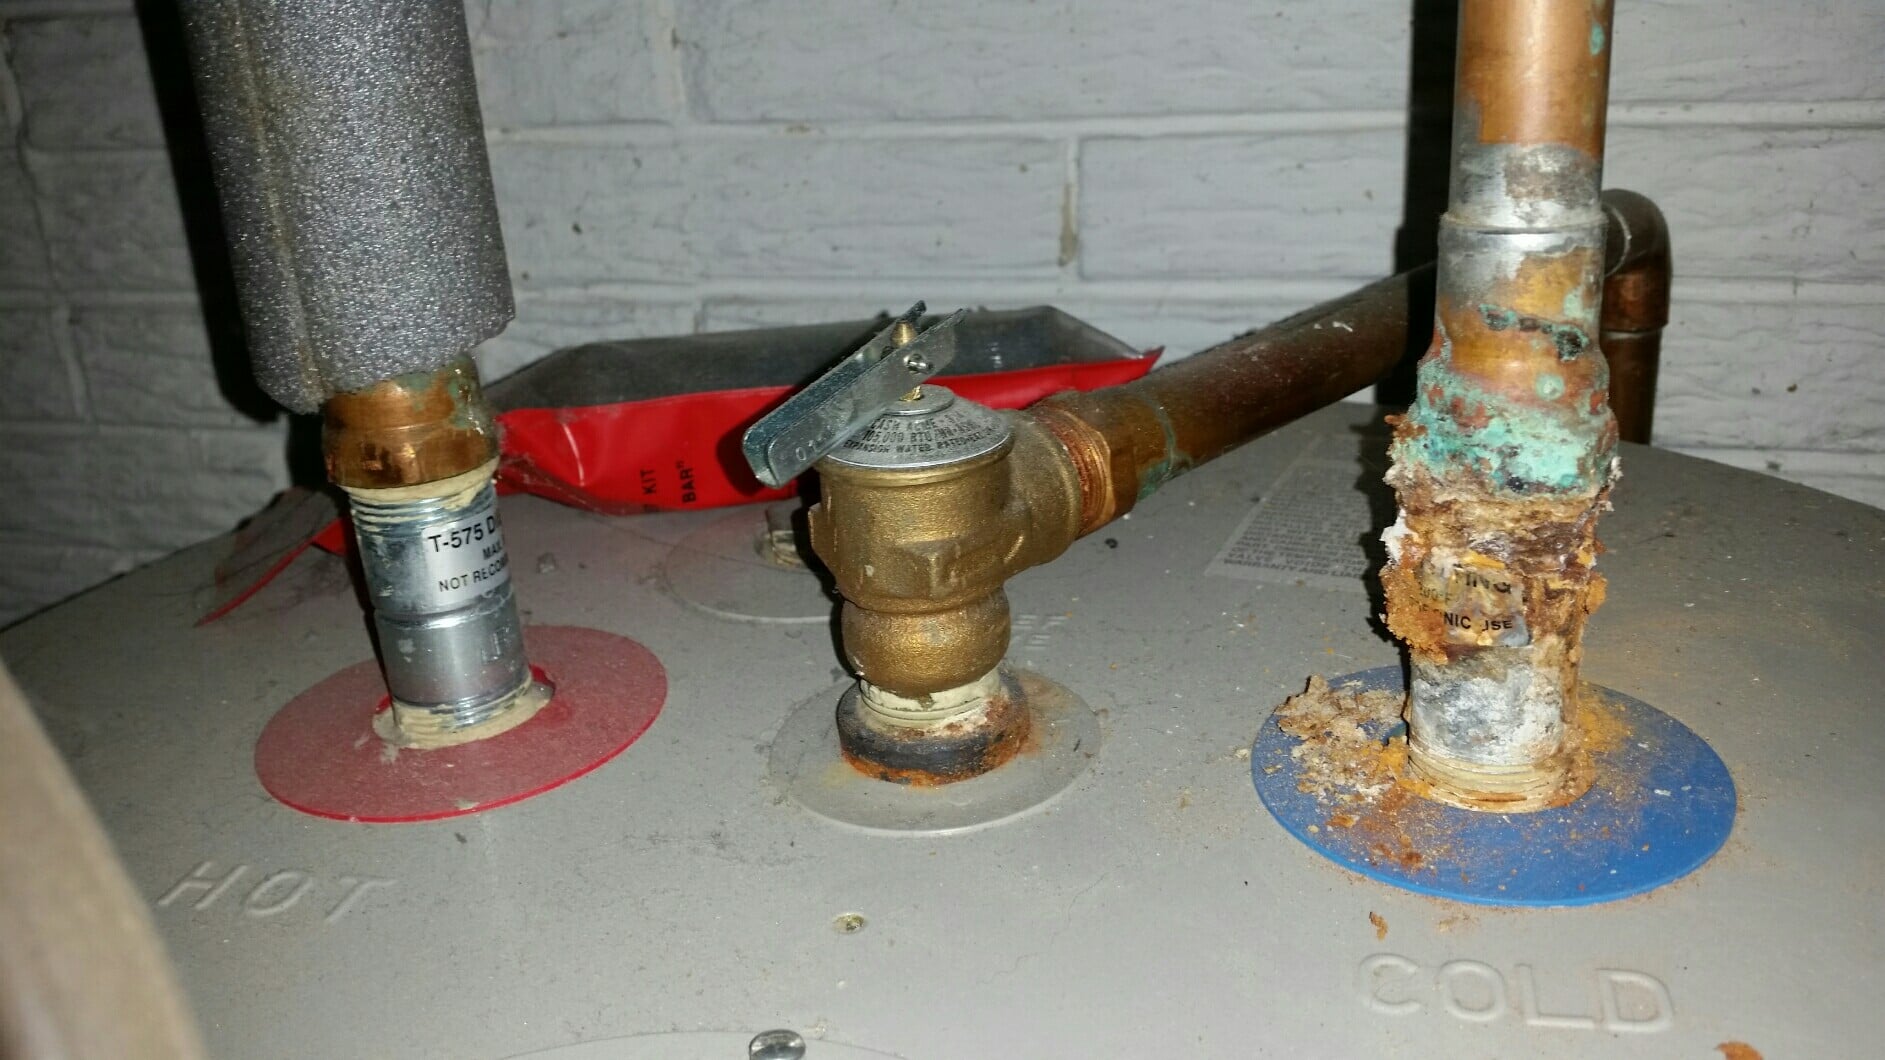
Pressure Relief Valve (PRV) Leak:
The pressure relief valve is designed to release excess pressure from the water heater. If it malfunctions or becomes faulty, it can cause water to leak from the valve of the water heater.
Corrosion and Condensation:
Over time, the metal components of the water heater can corrode. Naturally, it will lead to small leaks or even ruptures. On the other hand, in certain conditions, condensation can form on the exterior of the water heater. It will cause the water heater to get dripping too.
Loose Drain Valve:
The drain valve is located near the bottom of the water heater. It can become loose or worn out with time, causing water to leak from the tank. So, you must know what to do if the water heater leaks from the bottom.
Broken Temperature and Pressure (T&P) Relief Valve:
Like the PRV, the T&P relief valve helps regulate temperature and pressure. If it fails, it may cause water to leak from the valve, which makes the entire water heater leaky.
How to Fix A Leaking Water Heater: Step-by-Step Guideline
When you find the water heater dripping, you must act quickly to fix it. Thankfully, it is an easier repair process than you think. Read more.
Step 1: Turn Off the Power and Water Supply
Since water heaters are electrical appliances, you must work safely for the water heater. So, ensure to turn off the water heater safely.
- For electric water heaters, switch off the power at the circuit breaker.
- Turn the gas supply valve to the “off” position for gas water heaters.
- Shut off the cold-water supply to the water heater.
Step 2: Drain the Water Heater:
Next, drain the water heater to avoid water spillage on your floor. It will also make your repairing job crucial. First, carefully attach a garden hose to the drain valve. It will be at the bottom of the water heater.
Afterward, place the other end of the hose in a safe location, like a floor drain or outside. Lastly, open the drain valve to let the water flow out. Be cautious, as the water may be hot. Also, it will help you know if the water heater is leaking from the drain valve.
Step 3: Inspect the Valves
It’s time to check the Pressure Relief Valve (PRV) and Temperature and Pressure (T&P) Relief of the water heater. So, you must observe the entire valve and find what’s happening inside the valves.
- Check for any signs of leakage or corrosion on these valves.
- If water comes from the valves, briefly test them by lifting the lever
- If the valve works correctly, the water should stop when you release the lever.
Step 4: Replace Faulty Valves
If you find the water heater valves leaking, you must replace the faulty valves. It’s crucial because fixing the valves may be tough and a temporary solution.
So, be sure whether the PRV or T&P relief valve is leaking or not functioning correctly. You should replace them with new ones if they don’t work properly. To find the compatible one, you must look at the water heater drain valve types. Usually, it will be:
- Brass Drain Valve
- Plastic Drain Valve
- Full Port Ball Valve Drain Valve
Step 5: Check for Loose Drain Valve
Sometimes, the valve may not be damaged or faulty. Instead, it only gets loose. So, you have to tighten the loose valve to stop the water heater leakage. After that, you must tighten the drain valve. After that, check if it stops the leakage.
Step 6: Inspect and Repair Corrosion and Condensation
At this point, you should examine the tank and other components for signs of corrosion. If you find significant corrosion, try welding the corroded space. If it still looks corroded, you must replace the water heater altogether.
Also, you should look for suspected condensation and if it is causing the leak. If so, you must insulate the water heater with an insulation blanket. Alternatively, you can use foam pipe insulation on the pipes to remove the condensation.
Conclusion:
You should never ignore a leaking water heater. Or it can lead to severe damage and safety hazards. Thankfully, you can safely and effectively fix a leaking water heater with the above step-by-step guidelines.
If you still need to figure out the repairs, seek a professional. Also, ensure regular maintenance and inspections to prevent leaks and extend the water heater’s lifespan.